Why Natural Light Makes or Breaks Your Bali Villa Photos
When potential guests browse villa listings on Airbnb, Booking.com, or your direct booking website, the first thing they notice is light. Not the furniture. Not the infinity pool. Light.
Bali is extraordinarily gifted with natural light — warm tropical sun, soft morning hazes, and that iconic golden glow that spills across rice fields and villa terraces alike. Yet many villa owners and managers settle for mediocre listing photos simply because natural light was not used strategically during the shoot.
If you want your Bali villa to look irresistibly warm, spacious, and luxurious in photos, mastering natural light is non-negotiable. In this guide, we break down the best natural lighting techniques for Bali villa interior photography — so you know exactly what to prepare, when to schedule your shoot, and how to communicate with your photographer.
Understanding Bali’s Natural Light Throughout the Day
Before diving into specific techniques, it helps to understand how tropical light behaves in Bali across different times of day.
Golden Hour: The Magic Window
Golden hour in Bali typically occurs 30–60 minutes after sunrise and 30–60 minutes before sunset. During these windows, sunlight enters at a low angle, casting long, warm shadows and bathing interiors in an amber glow that no artificial light can replicate convincingly.
For villa interiors, the morning golden hour (around 6:00–7:30 AM) is often preferred. The air is cleaner, the light is cooler and more directional, and there is no harsh midday glare to manage. Many professional villa photographers in Bali structure their entire shoot day around this window.
Midday Light: Handle With Care
Between 10:00 AM and 3:00 PM, tropical sunlight is intense and nearly vertical. This creates deep, unflattering shadows, blown-out highlights near windows, and an overall harshness that makes interiors look stark rather than inviting. Shooting interiors during this period requires significant light management — diffusion panels, curtain control, or bracketed exposures that are later blended in post-processing.
Blue Hour and Overcast Days: Underrated Gems
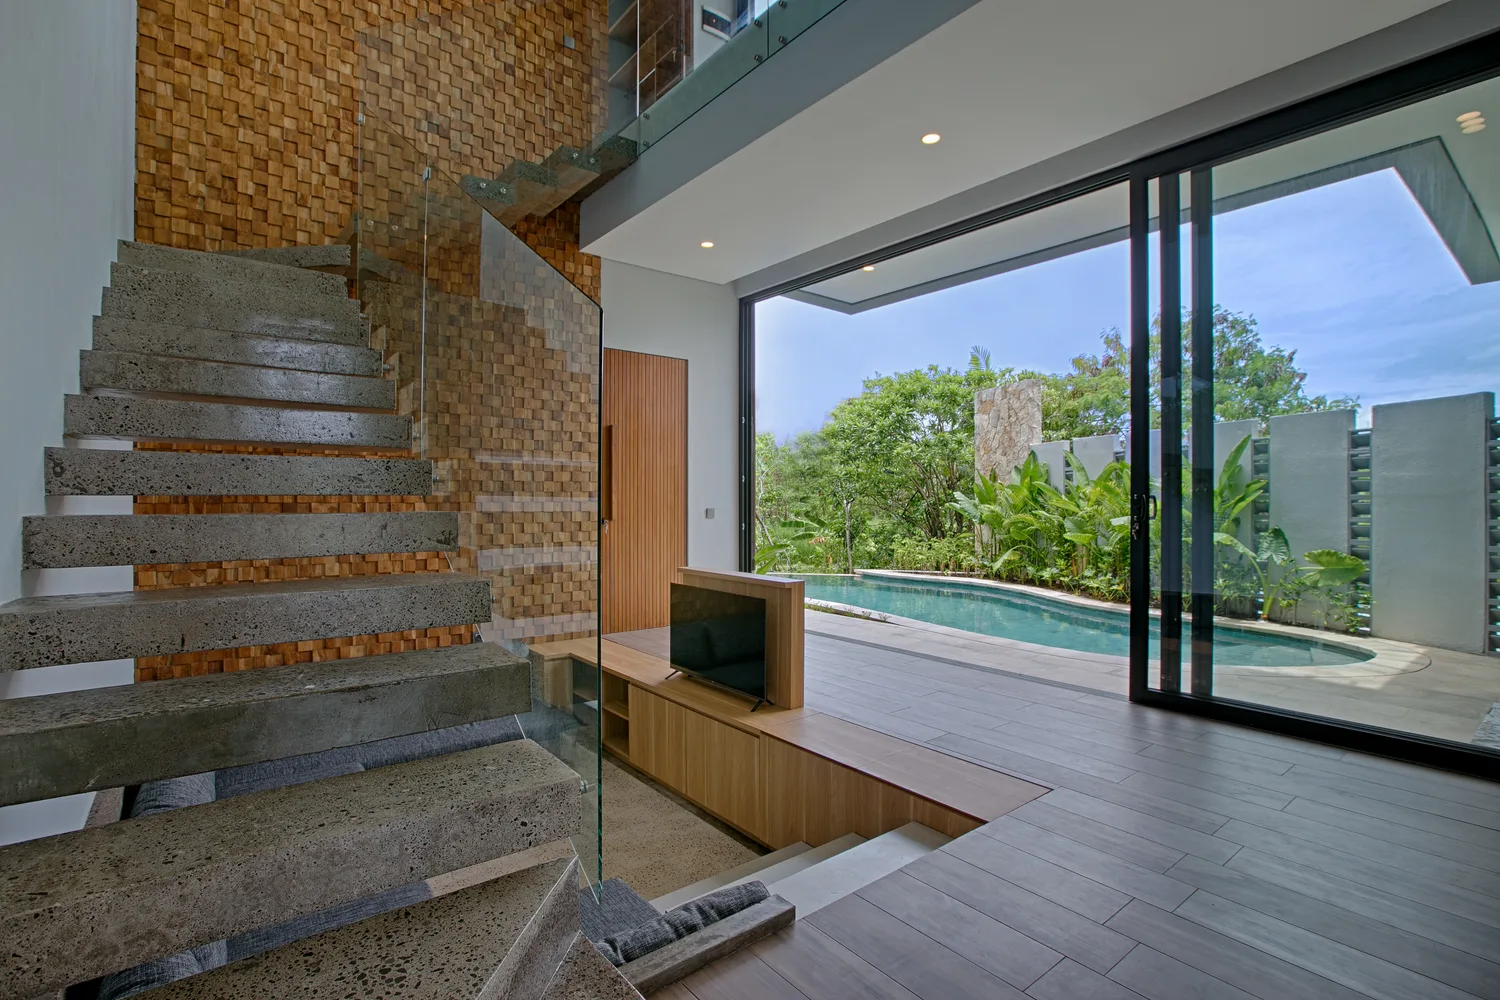
Just before sunrise and just after sunset, the sky turns a deep, even blue. Shooting interiors during blue hour with warm interior lighting switched on creates a beautiful contrast — the inside glows amber and gold against a dramatic blue exterior. This technique works especially well for open-plan villas with garden or pool views.
Overcast days are another secret weapon. Cloud cover acts as a natural giant softbox, diffusing sunlight evenly and eliminating harsh shadows. Colors render more accurately, and textures in stone, wood, and fabric come alive.
The Best Natural Lighting Techniques for Bali Villa Interior Photography
1. Align Your Shoot Time With Window Orientation
The direction your villa’s windows and doors face determines when natural light will be most favorable inside each room.
- East-facing rooms receive warm, directional morning light — ideal for bedrooms and open living areas.
- West-facing rooms catch the golden afternoon and sunset light — perfect for dining areas, lounges, and terraces.
- North or south-facing rooms receive more consistent, diffused light throughout the day.
Before your shoot day, walk through each space at different times and observe where and when light enters naturally. Share these observations with your photographer so they can build an efficient shooting schedule room by room.
2. Use Sheer Curtains as Natural Diffusers
Direct sunlight streaming through an open window creates bright spots and deep shadows — a nightmare for balanced interior exposure. Thin, sheer curtains or voile panels act as a natural diffuser, softening the light while still maintaining a bright, airy feel.
For Bali villas with traditional wooden shutters or louvers, partially closing them creates beautiful slats of light that add depth and texture to an image without overwhelming the sensor.
3. Bounce Light With Reflective Surfaces
One of the most effective — and completely free — natural lighting techniques is strategic use of reflective surfaces already present in your villa.
- Light-colored walls, white-washed ceilings, and pale stone floors bounce ambient light deep into a room.
- Mirrors placed opposite windows double the perceived light in a space.
- Pools and water features adjacent to open-plan living areas reflect shimmering natural light upward and inward, creating a uniquely Bali atmosphere in photos.
Before a professional shoot, consider temporarily repositioning mirrors or decorative reflective objects to maximize light distribution in darker corners.
4. Layer Ambient, Natural, and Accent Light
The most compelling villa interior photos rarely rely on a single light source. Professional Bali villa photographers use a technique called light layering: combining natural window light with warm interior ambient lights (pendant lamps, floor lamps, bedside lights) and accent lights (under-shelf lighting, pool lighting, candles) to create depth and visual interest.
This approach is particularly powerful during blue hour shoots. Switching on all villa lighting while the sky transitions from gold to deep blue creates a cinematic, editorial quality that immediately elevates perceived luxury.
5. Control and Eliminate Light Pollution
Not all light in your villa is helping your photos. Fluorescent overhead lights, cool-toned tube lights, and mismatched color temperature bulbs compete with warm natural light and create an unflattering mixed-light problem.
Before your shoot:
- Replace any cool-white or fluorescent bulbs with warm-white LED bulbs (2700K–3000K).
- Switch off overhead lights that compete with natural window light during daytime shots.
- Remove temporary lighting rigs or visible extension cords.
A clean, consistent light temperature throughout the villa ensures that your photos feel cohesive, warm, and professionally executed.
6. Prepare the Space for Maximum Light Entry
The physical state of your villa directly affects how much natural light enters each room. On shoot day, ensure:
- All windows, sliding doors, and folding glass walls are fully open or cleaned of fingerprints and dust.
- Garden trees or hedges that block natural light from entering key rooms are trimmed back.
- Dark, heavy curtains are removed or tied back completely.
- Outdoor umbrellas or awnings near windows are retracted to allow maximum light flow.
These small preparation steps cost nothing but can dramatically improve how bright and open your villa feels in photographs.
Common Natural Lighting Mistakes Bali Villa Owners Make
Even beautiful villas end up with disappointing photos when these errors are made:
- Scheduling shoots at midday to be convenient, sacrificing the golden hour entirely.
- Leaving overhead fluorescent lights on during daytime shots, creating an orange-green cast.
- Not accounting for seasonal light differences — Bali’s wet season (November–March) brings more overcast conditions that require adjusted techniques.
- Forgetting the exterior connection — in open-plan Bali villas, exterior brightness must be balanced with interior exposure, or windows will appear as blown-out white rectangles.
A skilled professional villa photographer in Bali will anticipate and solve all of these challenges — but being an informed villa owner means you can ask better questions and prepare your property more effectively.
How a Professional Bali Villa Photographer Maximizes Natural Light
While these techniques are actionable for any villa owner, the results achieved by a trained professional photographer are in a different category. Here is what a professional brings to the natural light equation:
- Technical expertise in exposure bracketing and HDR blending to manage the extreme contrast between bright Bali exteriors and shaded interiors.
- Color calibration to ensure consistent, accurate color rendering across all rooms regardless of varying light conditions.
- Composition skills that frame windows and light sources as visual anchors rather than problems to avoid.
- Post-processing precision to enhance natural light in editing without making photos look artificial or over-processed.
At Villa Photo Bali, we have photographed dozens of villas across Seminyak, Canggu, Ubud, Uluwatu, and beyond. Our shoots are meticulously timed around Bali’s natural light patterns, and every image is professionally edited to reflect the true beauty of your property — naturally lit, authentically Balinese, and built to convert browsers into bookers.
Ready to Show Your Villa in Its Best Light?
Your villa deserves photography that captures what makes it genuinely special — and in Bali, that always starts with light.
Whether you are preparing for a new listing launch, refreshing outdated photos, or building a direct booking website, we are here to help.
👉 View our photography packages and pricing 👉 Get in touch to book your villa shoot
Let’s capture your villa the way it was meant to be seen — in perfect Bali natural light.
Professional Villa Photography in Bali
Ready to Transform Your Villa Listing?
Get a free consultation and see how professional photography can increase your villa's occupancy and nightly rate.