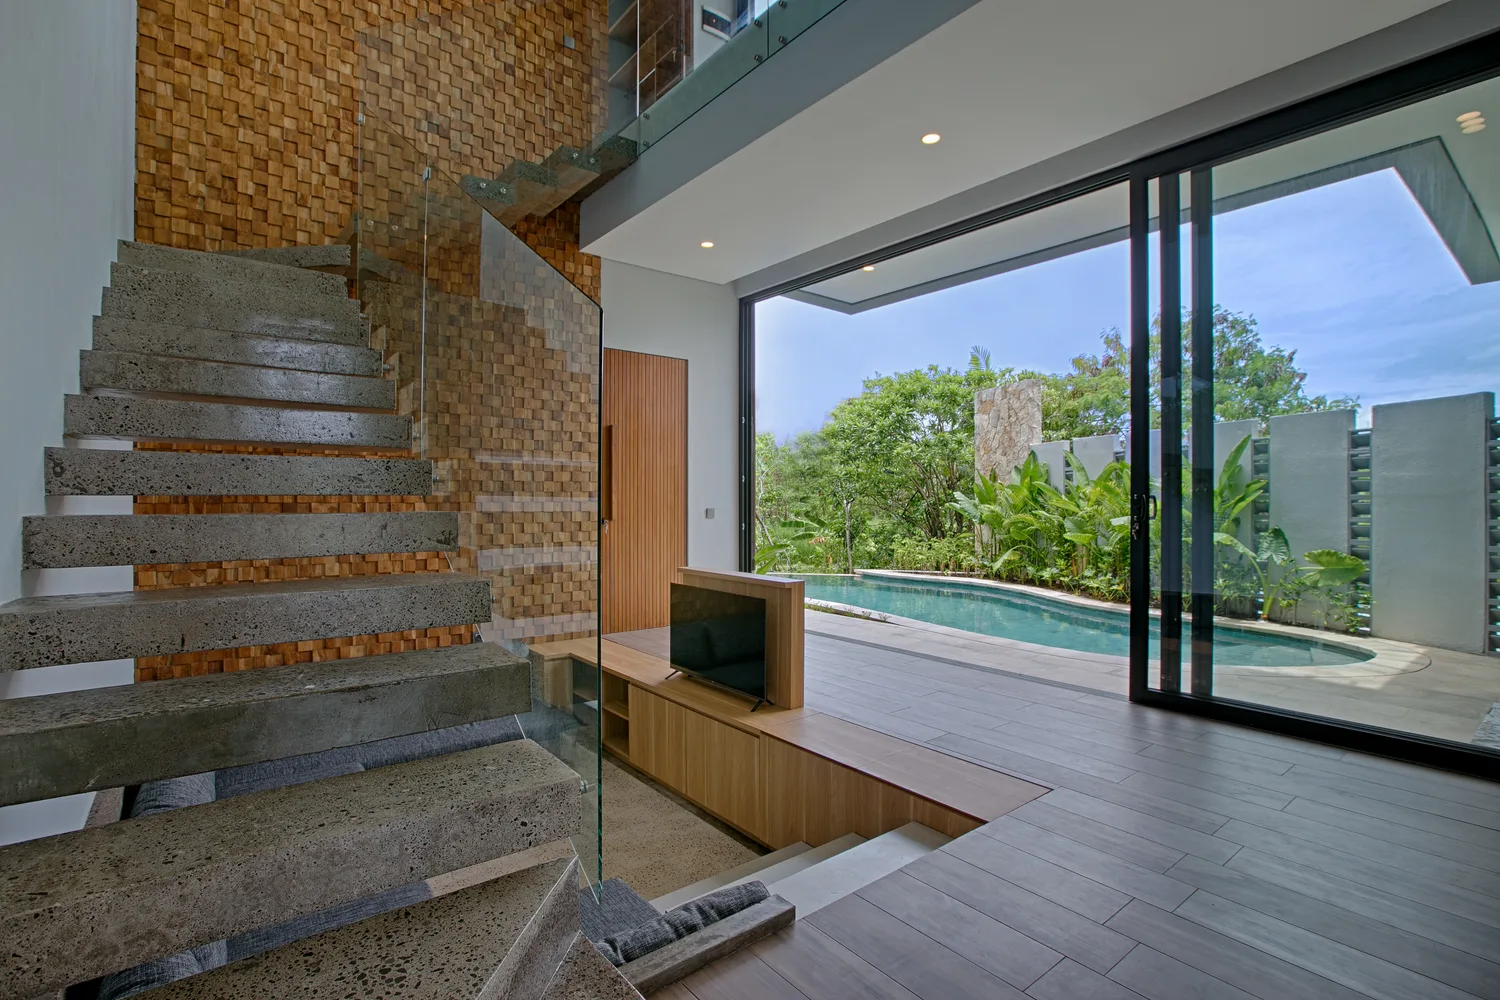
Best Camera Settings for Photographing Bali Villa Interiors in Natural Light
First impressions on platforms like Airbnb, Booking.com, and your own villa website are made entirely through photographs. Before a guest reads a single word of your listing description, they have already judged your property based on imagery. For Bali villa owners and managers, understanding the best camera settings for photographing Bali villa interiors in natural light is the difference between a calendar that stays empty and one that books out months in advance.
Whether you are doing a quick self-shoot before calling in a professional, or you simply want to understand what a skilled photographer is doing when they visit your property, this guide will walk you through everything you need to know.
Why Natural Light Is Your Greatest Asset in Bali
Bali has a gift that villa owners in colder climates can only dream about: abundant, warm, beautiful natural light. The tropical sun floods through floor-to-ceiling shutters, bounces off polished terrazzo floors, and filters softly through rattan and bamboo screens. This quality of light — when captured correctly — makes your villa feel alive, welcoming, and luxurious without a single artificial lamp.
The key word is correctly. Natural light in Bali can also be brutally harsh. Midday sun creates blown-out highlights on white linens and deep, unflattering shadows in corners. Knowing when and how to shoot is just as important as the camera settings themselves.
The Golden Hours in Bali
- Morning golden hour: Approximately 6:30 AM to 8:30 AM. Light is warm, soft, and directional. Ideal for east-facing rooms and infinity pool edges.
- Late afternoon golden hour: Approximately 4:30 PM to 6:00 PM. Perfect for west-facing living pavilions and outdoor daybeds.
- Overcast days: An underrated secret. Clouds act as a giant natural softbox, eliminating harsh shadows entirely. Great for consistent interior shots.
Avoid shooting interiors between 10 AM and 3 PM unless you have professional-grade window management and supplemental lighting.
Essential Camera Settings for Villa Interior Photography
You do not need the most expensive camera body on the market. What you need is an understanding of the exposure triangle — aperture, shutter speed, and ISO — and how to apply it in a real villa environment.
Aperture: Balancing Sharpness and Depth
For interior photography, you want the entire room to be in focus — from the foreground cushions on a daybed to the rice field view through the window behind it.
Recommended aperture: f/8 to f/11
At f/8, you get excellent sharpness across the full depth of a room without the diffraction softness that starts appearing at very narrow apertures like f/16 or f/22. Avoid wide apertures like f/1.8 or f/2.8 for interiors — these are portrait settings that will leave your background blurry and unflattering.
Shutter Speed: Eliminating Camera Shake
Because you will be shooting at smaller apertures (which let in less light), your shutter speed will often be slow — sometimes 1/15s or even slower.
Always use a tripod. This is non-negotiable for interior photography.
Recommended shutter speed range: 1/15s to 1/2s depending on light levels. With a tripod and a remote shutter release (or your camera’s 2-second timer), you eliminate all camera shake and can shoot at any speed you need.
ISO: Keep It as Low as Possible
High ISO introduces digital noise, which destroys the clean, luxurious look that villa photography requires.
Recommended ISO: 100–400
Start at ISO 100. Only raise ISO if you cannot achieve correct exposure through aperture and shutter adjustments alone. On modern mirrorless cameras, ISO 800 is still acceptable, but try to stay below that threshold whenever possible.
White Balance: Getting Your Colours Right
Bali’s natural light can range from very warm (early morning) to a cool blue (open shade or overcast). Auto White Balance often struggles with mixed light sources — a common situation when you have warm sunlight coming through one window and a shaded courtyard visible through another.
Recommended approach: Shoot in RAW format and set a manual white balance in post-processing. A starting point of 5500K–6000K replicates the warmth of natural Bali morning light beautifully. Cooler, more neutral interiors photograph well around 5000K–5500K.
If you must shoot in JPEG, use the Cloudy or Shade white balance preset to add warmth without looking artificial.
Composition Settings and Techniques That Matter
Camera settings only tell half the story. The other half is how you frame the shot.
Use a Wide-Angle Lens, But Not Too Wide
A focal length of 16mm to 24mm (full-frame equivalent) is ideal for most villa interiors. This range lets you capture the full scope of a spacious living pavilion or master bedroom without the barrel distortion and perspective exaggeration that ultra-wide lenses (10mm–14mm) produce.
Distortion makes rooms look fake. Guests notice — even if they cannot articulate why.
Shoot from Corner to Corner
Position your camera in a corner of the room and shoot diagonally across to the opposite corner. This technique maximises the sense of space and depth, making even a modestly sized bedroom feel expansive and inviting.
Enable Your Camera’s Grid Lines
Use a 3×3 grid overlay in your viewfinder or live view. Keep vertical lines (door frames, columns, wall edges) perfectly straight. Tilted verticals are one of the most common and damaging mistakes in amateur interior photography.
Managing Challenging Light Situations in Bali Villas
Dealing with Bright Windows
One of the hardest challenges in tropical villa photography is the contrast between a dark interior and an extremely bright outdoor view — a pool, garden, or ocean vista. Your camera cannot expose correctly for both simultaneously in a single shot.
Solutions:
- HDR bracketing: Shoot three to five exposures at different exposures and blend them in post-processing (Lightroom or Photoshop).
- Flash fill: A small, off-camera flash bounced off the ceiling or a white card can lift the interior exposure to match the bright outdoor background.
- Professional photographers use a combination of both techniques and ambient light management to create images that look completely natural while technically combining multiple exposures.
Using Reflectors and Bounce Cards
A simple 5-in-1 reflector (available for under USD $20) can redirect natural window light into dark corners, filling shadows without any artificial light source. Position a silver or white reflector just outside the camera frame, angled to bounce light from a bright window into a shaded area of the room.
Post-Processing: The Step That Transforms Good into Great
Even with perfect in-camera settings, post-processing is essential in professional villa photography.
Key adjustments in Lightroom or equivalent:
- Lens correction: Remove barrel distortion and vignetting automatically.
- Perspective correction: Straighten vertical and horizontal lines using the Transform panel.
- Exposure and highlights: Recover blown-out window highlights and open up shadows in corners.
- Colour grading: Ensure the villa’s colours — those beautiful terracotta tiles, white linens, tropical greenery — look true to life and inviting.
- Sharpening and noise reduction: Sharpen architectural details while smoothing any high-ISO noise.
Consistency across all images in a set is also critical. Your listing should look like a cohesive portfolio, not a collection of random snapshots taken under different conditions.
When to Call a Professional Bali Villa Photographer
Understanding these settings gives you respect for the craft — and helps you recognise the gap between a technically competent snapshot and a commercially powerful photograph.
Professional villa photographers in Bali bring more than camera knowledge. They bring:
- Professional-grade equipment including full-frame cameras, tilt-shift lenses for perfect perspective control, and portable lighting rigs.
- Styling expertise — knowing how to arrange towels, fluff cushions, place flowers, and stage tablescapes that photograph beautifully.
- Editing workflows refined specifically for luxury hospitality photography.
- Experience reading Bali’s light across hundreds of different villa types and orientations.
For villa owners with serious booking goals, professional photography is not an expense — it is one of the highest-return investments you can make in your property’s commercial performance.
Ready to Showcase Your Villa at Its Best?
Whether you want to understand the process, prepare your villa for a shoot, or book a full professional photography session, Villa Photo Bali is here to help.
👉 View our photography packages and pricing — transparent, straightforward packages designed for Bali villa owners.
👉 Get in touch with our team — we will discuss your villa, your goals, and create a shoot plan tailored to your property.
Your villa deserves photographs that work as hard as you do. Let us make that happen.